

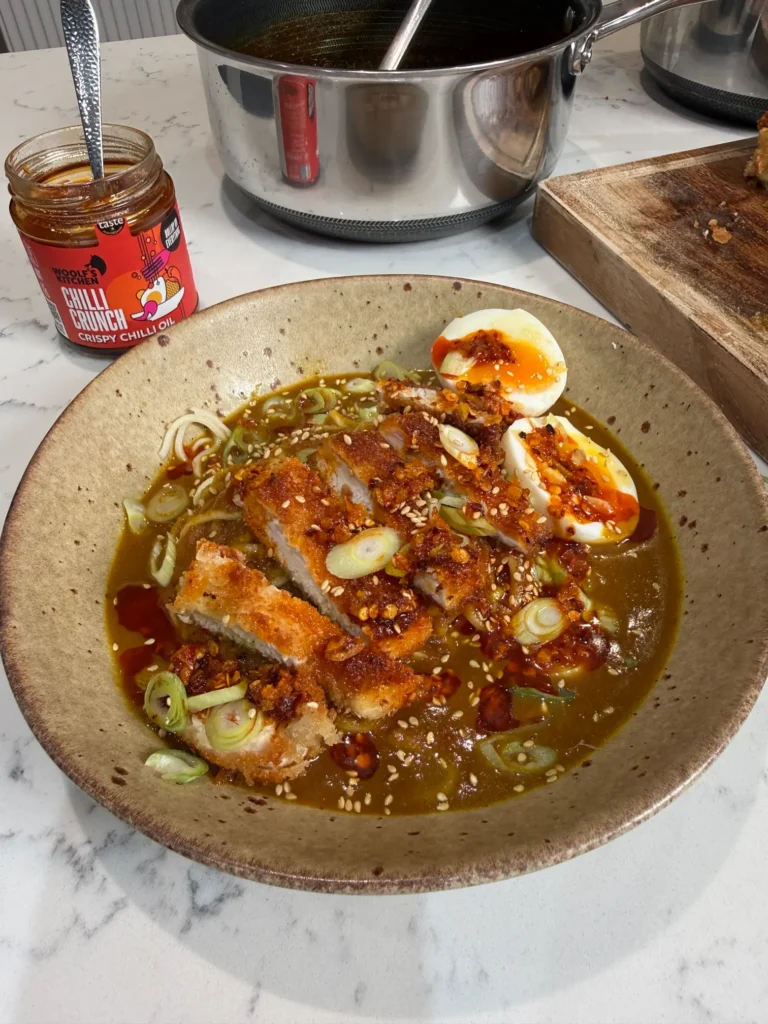
Chicken Katsu Ramen
If you love chicken katsu curry and a big bowl of comforting ramen, this Chicken Katsu Ramen is going to be right up your street. You’ve got crispy, golden chicken coated in crunchy panko breadcrumbs, served over ramen noodles in a rich, creamy Japanese-inspired curry broth. Finish everything with a jammy boiled egg, fresh spring onions, sesame seeds and a generous drizzle of crispy chilli oil, and you’ve got something seriously delicious.
It’s basically two of my favourite Japanese-inspired dishes combined into one bowl.
And I think it works brilliantly.
The chicken is butterflied, coated in flour, egg and panko breadcrumbs, then shallow-fried until golden and crispy. Meanwhile, the broth is made with onion, carrot, garlic, ginger, mild curry powder, turmeric, coconut milk and chicken stock.
Once the vegetables have softened, everything gets blended until smooth, creating a lovely silky curry broth. A little soy sauce and honey finish it off, bringing that perfect balance of savoury and sweet flavours.
Then it’s simply a case of cooking the ramen noodles, assembling everything in bowls and adding the toppings.
What I particularly love about this recipe is the contrast between the crispy chicken and the creamy broth. You’ve got that lovely crunch from the panko coating, soft noodles underneath and a rich, gently spiced curry sauce bringing everything together.
And then there’s the crispy chilli oil.
I absolutely love the stuff, and a spoonful over the top makes the whole dish even better.
If you’re looking for something a little different from your usual chicken katsu curry or noodle soup, this is definitely one to try.
What is Chicken Katsu Ramen?
Chicken Katsu Ramen is a Japanese-inspired fusion dish that combines crispy breaded chicken with ramen noodles and a rich curry-flavoured broth.
Chicken katsu is a popular Japanese dish made with breaded and fried chicken, usually served with rice, shredded cabbage or Japanese curry sauce.
Ramen, on the other hand, is a noodle soup traditionally made with wheat noodles served in a flavourful broth, often accompanied by meat, eggs and vegetables.
This recipe brings elements of both dishes together.
Rather than serving chicken katsu with rice and a thick curry sauce, we’re serving it over ramen noodles with a slightly looser, creamy curry broth.
It’s not a traditional Japanese ramen recipe, but it’s inspired by those familiar flavours.
And the combination is absolutely brilliant.
Why you’ll love this Chicken Katsu Ramen
There are a few things that make this recipe particularly good.
Firstly, the chicken is incredibly crispy.
Using panko breadcrumbs rather than ordinary breadcrumbs gives you that lovely light, crunchy coating.
Secondly, the broth is rich and creamy without needing double cream.
Instead, we’re using coconut milk, which works beautifully with the curry powder, ginger and garlic.
The onion and carrot add natural sweetness and help give the broth more body once everything is blended.
And finally, the toppings bring everything together.
The jammy egg adds richness, spring onions bring freshness, sesame seeds add a little texture and crispy chilli oil provides a lovely kick of heat.
It’s a complete dinner in a bowl, and although there are a few different elements, none of them are particularly complicated.
The difference between chicken katsu and chicken katsu curry
Chicken katsu simply refers to breaded and fried chicken.
The word katsu comes from the Japanese adaptation of the word cutlet.
Chicken katsu is usually made by coating chicken in flour, beaten egg and panko breadcrumbs before frying until golden.
Chicken katsu curry takes that crispy chicken and serves it with Japanese-style curry sauce, usually alongside rice.
This recipe uses the same principle for the chicken, but instead of serving it with rice, we’re adding ramen noodles and turning the curry sauce into a creamy broth.
You still get those familiar katsu curry flavours, just in a slightly different format.
Why I butterfly the chicken breasts
For this recipe, I’m using two chicken breasts, which are butterflied before coating.
Butterflying simply means slicing horizontally through the thickest part of the chicken breast and opening it out.
This creates a thinner, more even piece of chicken.
There are two main benefits.
Firstly, it cooks much more evenly.
Chicken breasts are naturally thicker at one end, which means the thinner end can become overcooked while you’re waiting for the thickest part to finish.
By butterflying the chicken, you reduce that difference.
Secondly, it creates a larger surface area for the crispy coating.
And when you’re making chicken katsu, that’s definitely a good thing.
Why panko breadcrumbs are best for chicken katsu
Panko breadcrumbs are one of the most important ingredients in this recipe.
Unlike traditional fine breadcrumbs, panko has a much lighter, flakier texture.
That means it creates a crispier coating when fried.
The larger flakes also give the chicken that lovely uneven, crunchy surface you associate with proper chicken katsu.
For this recipe, I’m using 100g panko breadcrumbs.
You can find them in most supermarkets, usually in the Asian food section.
Ordinary breadcrumbs will work if that’s all you’ve got, but the finished coating won’t be quite the same.
If you want that proper crispy katsu texture, panko is definitely worth using.
How to get perfectly crispy chicken katsu
There are a few simple things that make a difference when frying breaded chicken.
Firstly, make sure the chicken isn’t too wet before coating it.
You want the flour to stick evenly rather than forming thick, wet clumps.
Secondly, follow the correct order when breading.
Flour first, then beaten egg, then panko breadcrumbs.
The flour helps the egg stick to the chicken, while the egg acts as the glue for the breadcrumbs.
Finally, make sure the oil is hot enough before adding the chicken.
If the oil is too cool, the breadcrumbs will absorb more oil and become greasy.
If it’s excessively hot, the coating can burn before the chicken has cooked through.
A moderate frying temperature of around 170–180°C works well.
Why the flour, egg and breadcrumb method works
This is a classic technique used for breaded chicken, schnitzel and plenty of other crispy dishes.
Each layer has a purpose.
Flour creates a dry surface that helps the egg adhere.
Beaten egg provides moisture and protein, helping the breadcrumbs stick.
Panko breadcrumbs create the crispy outer coating.
It’s important to coat the chicken evenly at each stage.
Shake off any excess flour before dipping it into the egg.
Let any excess egg drip away before pressing the chicken into the breadcrumbs.
Then gently press the panko onto the surface to make sure it sticks.
You don’t need an excessively thick coating.
Just a nice, even layer.
How long should you fry chicken katsu?
Because we’re butterflying the chicken breasts, they cook relatively quickly.
For this recipe, I shallow-fry them for approximately 3–4 minutes on each side.
You want the breadcrumbs beautifully golden and crispy, with the chicken cooked all the way through.
The exact cooking time depends on the thickness of the chicken.
If you’re unsure, use a meat thermometer.
Chicken should reach 75°C in the thickest part.
Once cooked, transfer the chicken to a wire rack or a plate lined with kitchen paper.
I prefer a wire rack because it allows air to circulate underneath, helping keep the coating crispy.
Leave the chicken for a couple of minutes before slicing.
Why I use coconut milk in the curry broth
The broth is probably my favourite part of this recipe.
Rather than making a traditional ramen broth or a thick Japanese curry sauce, we’re creating something somewhere between the two.
The base contains 400ml coconut milk and 300ml chicken stock.
The coconut milk gives the broth a rich, creamy texture without needing double cream.
It also balances the curry powder and spices beautifully.
Chicken stock adds savoury flavour while keeping the consistency loose enough to work as a noodle soup.
The result is a creamy curry broth that coats the noodles without being excessively thick.
I’d recommend using full-fat coconut milk for the best texture.
Reduced-fat coconut milk can work, but the broth won’t be quite as rich.
Why onion and carrot make the broth creamy
There’s one onion and one carrot in the curry broth.
Both ingredients are cooked until softened before being blended with the coconut milk and chicken stock.
The onion adds sweetness and savoury depth, while the carrot brings natural sweetness and helps give the broth a lovely colour.
Once blended, the vegetables also add body.
That’s important because it means we don’t need to thicken the broth with flour or cornflour.
The vegetables themselves help create that smooth, velvety consistency.
It’s a really simple technique, but it works brilliantly.
Garlic and ginger bring loads of flavour
Garlic and ginger are essential ingredients in this curry broth.
I’m using three garlic cloves and 15g fresh ginger, both minced.
Garlic brings a lovely savoury flavour, while ginger adds warmth and a slightly sharp, aromatic quality.
Once the onion and carrot have softened, add the garlic and ginger along with the curry powder and turmeric.
Cook everything for around a minute.
This allows the spices to become fragrant before adding the liquid.
Just keep everything moving because garlic and ground spices can burn quite quickly.
Why mild curry powder works so well
For this recipe, I’m using one tablespoon of mild curry powder.
Japanese curry is generally known for being relatively mild, with a warm, slightly sweet flavour rather than intense chilli heat.
Mild curry powder gives us a convenient way to recreate some of those familiar flavours without needing a long list of individual spices.
Different curry powder blends vary, but they commonly contain ingredients such as turmeric, coriander, cumin and fenugreek.
The important thing is choosing a blend you enjoy.
We’re also adding half a teaspoon of turmeric for extra colour and flavour.
Why I blend the curry broth
Once the vegetables have simmered in the coconut milk and chicken stock for around 10 minutes, they should be soft enough to blend.
This is what gives the broth its lovely smooth texture.
Rather than having pieces of onion and carrot floating around, everything becomes incorporated into the sauce.
You can use a stick blender directly in the saucepan, which is probably the easiest option.
Alternatively, you can carefully transfer the mixture to a suitable blender.
If using a jug blender, allow the liquid to cool slightly and follow the manufacturer’s instructions for blending hot liquids.
Once smooth, return the broth to the heat and stir in the soy sauce and honey.
Why soy sauce and honey are added at the end
There are two tablespoons of soy sauce and two tablespoons of honey in the broth.
Soy sauce brings saltiness and savoury depth, while honey balances the spices and adds a gentle sweetness.
Together, they help create that familiar sweet and savoury curry flavour.
I prefer adding them after blending because it’s easier to taste and adjust the finished broth.
Depending on the saltiness of your chicken stock and soy sauce, you might not need any additional salt.
Always taste before seasoning.
What noodles are best for Chicken Katsu Ramen?
For this recipe, I’m using 150g dried ramen noodles.
Ramen noodles are typically made from wheat flour and have a slightly springy, chewy texture.
They work brilliantly with the creamy curry broth because they hold their shape and absorb some of the flavour.
You can buy dried ramen noodles in most supermarkets and Asian food shops.
If you’re using instant ramen noodles, that’s absolutely fine too.
Just cook the noodles according to the packet instructions and leave out the seasoning sachets.
The curry broth already provides plenty of flavour.
Why I cook the noodles separately
You might be wondering why I don’t just cook the ramen noodles directly in the curry broth.
You could, but I prefer cooking them separately for this recipe.
As noodles cook, they release starch into the surrounding liquid.
If you cook them directly in the broth, they can make it thicker and slightly cloudy.
They’ll also absorb some of the liquid.
By cooking the noodles separately, you have much more control over the final consistency.
Once they’re cooked, simply drain them and divide them between the serving bowls.
Then pour the hot curry broth over the top.
The secret to a perfect jammy ramen egg
A soft-boiled egg is one of my favourite toppings for ramen.
For this recipe, I’m boiling the eggs for seven minutes.
That gives you a set white with a yolk that’s still slightly soft and jammy.
The exact result will depend on the size of the eggs and whether they’re straight from the fridge.
Once the eggs have cooked, transfer them immediately into cold water.
This stops the cooking process and helps prevent the yolks becoming too firm.
When they’re cool enough to handle, gently peel and cut them in half.
You should have a lovely golden yolk that works beautifully with the creamy broth.
Why crispy chilli oil is the perfect finishing touch
If you’ve followed my recipes for a while, you’ll know I love crispy chilli oil.
It’s one of those ingredients that can completely transform a dish with hardly any effort.
For this Chicken Katsu Ramen, I drizzle a little over the finished bowl.
The chilli oil brings heat, while the crispy bits add another layer of texture.
That works particularly well with the creamy coconut curry broth.
You’ve got richness from the coconut milk, sweetness from the honey, savouriness from the soy sauce and then a lovely kick from the chilli oil.
You can add as much or as little as you like.
If you’re cooking for someone who doesn’t enjoy spicy food, simply leave it off their portion.
Why spring onions and sesame seeds work so well
The final toppings might seem simple, but they make a real difference.
Sliced spring onions add freshness and a little crunch.
Sesame seeds bring a slightly nutty flavour.
Both help balance the rich curry broth and crispy chicken.
I like scattering them over everything just before serving.
Along with the jammy egg and crispy chilli oil, they make the finished bowl look absolutely brilliant.
How to assemble Chicken Katsu Ramen
Once all the individual elements are ready, assembling the ramen is incredibly straightforward.
Start by dividing the cooked noodles between two large bowls.
Pour over the hot, creamy curry broth.
Then slice the crispy chicken katsu into strips and arrange it over the noodles.
Add the halved boiled eggs, followed by the sliced spring onions and sesame seeds.
Finally, drizzle over some crispy chilli oil.
I’d recommend serving immediately.
The chicken will gradually soften as it sits in the broth, so you want to enjoy it while the coating is still lovely and crispy.
Can I make Chicken Katsu Ramen ahead of time?
You can prepare several parts of this recipe in advance.
The curry broth is particularly good for making ahead.
Once cooked, allow it to cool promptly before refrigerating in an airtight container.
Then gently reheat it when you’re ready to serve.
You can also prepare the chicken breasts and have your flour, beaten eggs and breadcrumbs ready.
However, I’d recommend frying the chicken shortly before serving.
That’s when the coating will be at its crispiest.
The ramen noodles are also best cooked fresh because they can become soft and sticky if left sitting for too long.
Can I make Chicken Katsu Ramen in the air fryer?
Yes, you can cook the breaded chicken in an air fryer rather than shallow-frying it.
You’ll need to lightly spray or brush the coated chicken with oil to help the breadcrumbs brown.
Cook at around 190°C for 12–16 minutes, turning halfway through, depending on the thickness of the chicken and your air fryer.
Make sure the chicken reaches 75°C in the thickest part.
The finished coating may be slightly different from shallow-fried katsu, but it’s a convenient alternative.
You can prepare the curry broth and noodles exactly as written.
What can I use instead of chicken?
You can adapt this recipe in several ways.
Pork loin is a good alternative if you want to make something closer to a pork katsu ramen.
You could also use firm tofu for a vegetarian version.
Press the tofu to remove excess moisture, then coat it in flour, egg and panko before frying.
For a fully vegetarian version, you’d also need to replace the chicken stock with vegetable stock and use a suitable alternative to the egg coating if required by your dietary preferences.
The creamy curry broth works with all sorts of different toppings.
Making this recipe in the US
This Chicken Katsu Ramen is easy to make in America, with a few ingredient translations and measurements worth knowing.
2 chicken breasts: The same ingredient in both countries. Butterfly them so they’re thin enough to cook evenly.
40g plain flour is approximately ⅓ cup all-purpose flour.
100g panko breadcrumbs is approximately 3½ oz panko breadcrumbs.
15g fresh ginger is approximately ½ oz fresh ginger.
400ml coconut milk is approximately 1⅔ US cups coconut milk. One standard 13.5 fl oz can is very close to this quantity.
300ml chicken stock is approximately 1¼ US cups chicken broth or chicken stock.
150g dried ramen noodles is approximately 5⅓ oz dried ramen noodles.
2 spring onions are called green onions or scallions in America.
Crispy chilli oil is often labelled chili crisp or crispy chili oil in American supermarkets.
For frying, an oil temperature of 170–180°C is approximately 340–355°F.
If you’re using an air fryer, 190°C is approximately 375°F.
Chicken should reach an internal temperature of 165°F, which is approximately 74°C.
If you’ve found this recipe while searching for chicken katsu ramen, Japanese curry ramen, crispy chicken ramen or creamy curry ramen noodles, this is exactly the sort of dish you’re looking for.
Ingredients
For the chicken
2 chicken breasts
40g plain flour
2 eggs, beaten
100g panko breadcrumbs
For the curry broth
1 onion, diced
1 carrot, diced
3 garlic cloves, minced
15g fresh ginger, minced
1 tbsp mild curry powder
½ tsp turmeric
400ml coconut milk
300ml chicken stock
2 tbsp soy sauce
2 tbsp honey
To serve
150g dried ramen noodles
2 eggs
2 spring onions, sliced
Crispy chilli oil
Sesame seeds
Method
1. Heat some cooking oil in a saucepan. Add the onion and carrot and cook for 5 minutes until the onion has softened.
2. Add in the garlic, ginger, curry powder and turmeric. Stir and cook for another minute.
3. Pour in the coconut milk and chicken stock, then simmer for 10 minutes until the vegetables are soft.
4. Blend until smooth, then stir in the soy sauce and honey, and taste for seasoning. Keep warm.
5. Boil the eggs for 7 minutes, then cool in cold water, peel and halve.
6. Butterfly the chicken breasts. Coat in flour, beaten egg, then panko breadcrumbs.
7. Heat some oil in a frying pan and shallow-fry the chicken for 3–4 minutes on each side until golden and cooked through.
8. Cook the ramen noodles according to the packet instructions, then drain.
9. Divide the noodles between two bowls and pour over the creamy curry broth.
10. Slice the crispy chicken and arrange it on top. Finish with the eggs, spring onions, sesame seeds and a drizzle of crispy chilli oil.
Equipment
Large saucepan
Frying pan
Stick blender or jug blender
Sharp knife
Chopping board
Three shallow bowls for breading
Kitchen tongs
Measuring jug
Measuring spoons
Kitchen scales
Slotted spoon
Meat thermometer, optional
FAQs
What is Chicken Katsu Ramen?
Chicken Katsu Ramen is a Japanese-inspired noodle dish combining crispy breaded chicken with ramen noodles and a flavourful broth. This version uses a rich, creamy coconut curry broth with garlic, ginger, soy sauce and honey.
Is Chicken Katsu Ramen a traditional Japanese dish?
Not exactly. Chicken katsu, Japanese curry and ramen are all popular elements of Japanese cooking, but this recipe combines them into a fusion-style dish rather than following a traditional ramen preparation.
Can I use chicken thighs instead of chicken breasts?
Yes. Boneless, skinless chicken thighs work well for katsu. Flatten them to an even thickness and adjust the cooking time as necessary.
Why do you use panko breadcrumbs for chicken katsu?
Panko breadcrumbs have a light, flaky texture that creates a particularly crispy coating when fried. They’re ideal for chicken katsu.
Can I use ordinary breadcrumbs instead of panko?
Yes, although the coating won’t be quite as light or crunchy. Panko is my preference for the best texture.
Can I make Chicken Katsu Ramen without coconut milk?
You can use an alternative creamy ingredient, but it will change the flavour and consistency. Coconut milk works particularly well with the curry powder and ginger.
Is Chicken Katsu Ramen spicy?
The curry broth itself is relatively mild because it uses mild curry powder. Most of the heat comes from the crispy chilli oil, which you can adjust or leave out.
Can I use instant ramen noodles?
Absolutely. Cook them according to the packet instructions and discard the seasoning sachets. The homemade curry broth provides plenty of flavour.
Can I cook the chicken katsu in an air fryer?
Yes. Lightly coat the breaded chicken with oil and air fry at around 190°C for 12–16 minutes, turning halfway through, until golden and cooked through.
Can I bake chicken katsu in the oven?
Yes. Place the breaded chicken on a lined baking tray, lightly spray with oil and bake at approximately 200°C fan for 18–25 minutes, depending on thickness, until golden and cooked through.
How do I stop chicken katsu becoming soggy?
Keep the cooked chicken separate from the broth until you’re ready to serve. Slice and add it to the ramen immediately before eating.
Can I make the curry broth ahead of time?
Yes. The broth can be prepared in advance, refrigerated and gently reheated when you’re ready to assemble the ramen.
Can I freeze the curry broth?
Yes. Allow it to cool completely, then freeze in a suitable airtight container. Defrost thoroughly in the fridge and reheat gently before serving.
Can I freeze Chicken Katsu Ramen?
I’d recommend freezing the curry broth separately rather than freezing the complete assembled dish. Freshly cooked noodles and crispy chicken will give you a much better texture.
How do I make a jammy ramen egg?
Boil the eggs for approximately seven minutes, then transfer them straight into cold water. Once cooled, peel and halve them. The yolks should be slightly soft and jammy.
Can I use vegetable stock instead of chicken stock?
Yes. Vegetable stock works well in the curry broth and is a good alternative if you’re adapting the recipe for a vegetarian version.
What is crispy chilli oil?
Crispy chilli oil, sometimes called chili crisp, is a condiment made with chilli flakes, oil and crunchy aromatics. It adds heat, flavour and texture to dishes such as noodles, rice and dumplings.
How do I thicken the curry broth?
The blended onion and carrot naturally help give the broth body. If you’d prefer it thicker, simmer it gently for a few extra minutes before adding the noodles.
How do I make the broth thinner?
Simply add a little extra chicken stock or water until you reach your preferred consistency.
What can I serve with Chicken Katsu Ramen?
It’s already a complete meal, but you could serve it with edamame, cucumber salad, gyoza or some steamed greens.
Final thoughts
This Chicken Katsu Ramen is one of those recipes that combines two brilliant dishes into something even better.
You’ve got the crispy, golden chicken katsu, the soft ramen noodles and that rich, creamy curry broth made with coconut milk, garlic, ginger and warming spices.
The broth is incredibly easy to make, particularly because the onion and carrot get blended directly into it, giving you a lovely smooth consistency without needing to make a complicated sauce.
Then you’ve got all the toppings.
The jammy egg, fresh spring onions, sesame seeds and crispy chilli oil really bring everything together.
The two things I’d concentrate on are getting the chicken beautifully golden and crispy, and keeping it separate from the broth until you’re ready to serve.
That way you get the perfect contrast between crunchy chicken and silky noodles.
It’s comforting, packed with flavour and a brilliant alternative to your usual chicken curry or noodle soup.
And if you love crispy chilli oil as much as I do, don’t be shy with it.
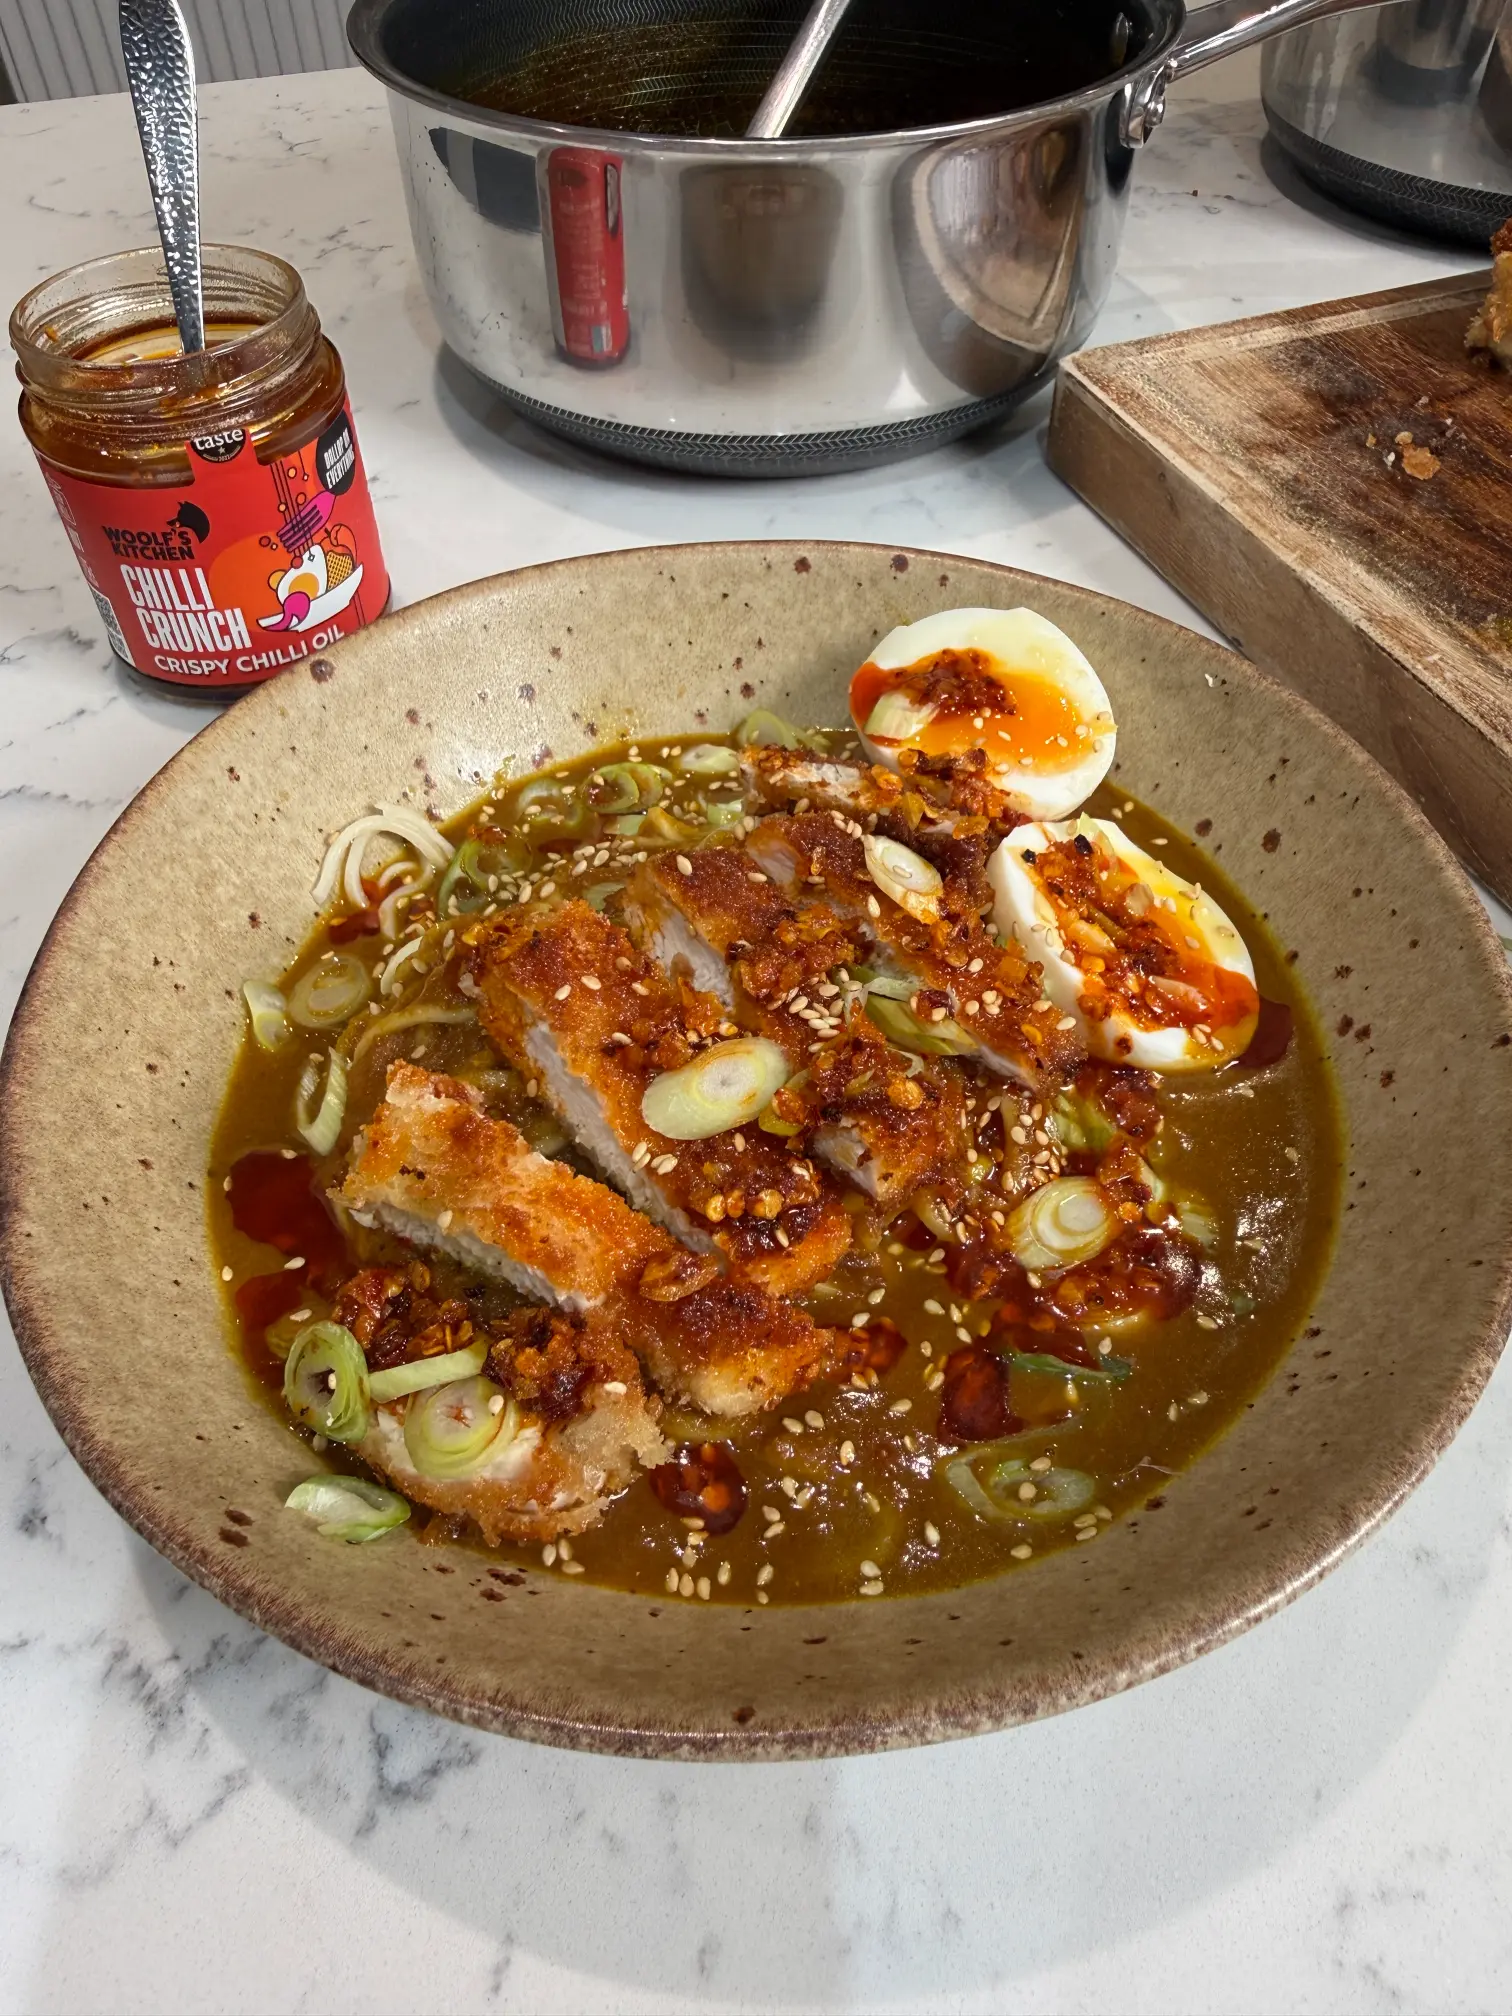
Chicken Katsu Ramen
Ingredients
For the chicken:
- 2 chicken breasts
- 40 g plain flour
- 2 eggs beaten
- 100 g panko breadcrumbs
For the curry broth:
- 1 onion diced
- 1 carrot diced
- 3 garlic cloves minced
- 15 g fresh ginger minced
- 1 tbsp mild curry powder
- ½ tsp turmeric
- 400 ml coconut milk
- 300 ml chicken stock
- 2 tbsp soy sauce
- 2 tbsp honey
To serve:
- 150 g dried ramen noodles
- 2 eggs
- 2 spring onions sliced
- Crispy chilli oil
- Sesame seeds
Instructions
- Heat some cooking oil in a saucepan. Add the onion and carrot and cook for 5 minutes until the onion has softened.
- Add in the garlic, ginger, curry powder and turmeric. Stir and cook for another minute.
- Pour in the coconut milk and chicken stock, then simmer for 10 minutes until the vegetables are soft.
- Blend until smooth, then stir in the soy sauce and honey, and taste for seasoning. Keep warm.
- Boil the eggs for 7 minutes, then cool in cold water, peel and halve.
- Butterfly the chicken breasts. Coat in flour, beaten egg, then panko breadcrumbs.
- Heat some oil in a frying pan and shallow fry the chicken for 3 to 4 minutes on each side until golden and cooked through.
- Cook the ramen noodles according to the packet instructions, then drain.
- Divide the noodles between two bowls and pour over the creamy curry broth.
- Slice the crispy chicken and arrange it on top. Finish with the eggs, spring onions, sesame seeds, and a drizzle of crispy chilli oil. Enjoy.